
How to Install a Water Softener
How to install a water softener: a complete guide
Our complete guide to installing a water softener will help you take practical steps towards transforming your home's water quality, from selecting the correct water softener system to the actual installation process.
Hard water is a common problem in many UK households, and it can be difficult to treat.
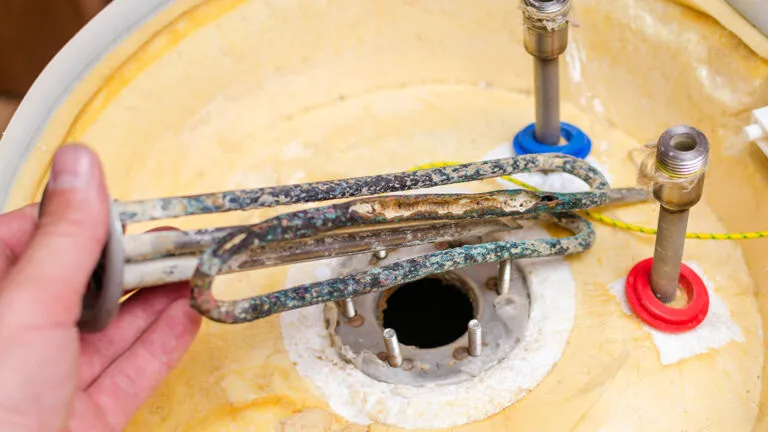
Limescale, the noticeable sign of hard water appears on fixtures, taps, glassware, and shower heads. It can scale up pipes and decrease water flow, damaging your plumbing system. Limescale makes cleaning difficult and frustrating, and it reduces the lifespan of your household appliances.
Don't let the effects of hard water in your home irritate you any longer. Let Fountain Filters break down how to transform your household's water from hard to soft with a water softener today.
Key Points
- The two main types are ion-exchange softeners (which swap calcium and magnesium for sodium using salt) and salt-free conditioners (which neutralise hardness minerals without salt or wastewater).
- Install the unit as close as possible to where the mains water enters your home, with adequate space, easy access, and protection from frost and direct sunlight.
- Ion-exchange softeners need a drain for the discharge line and an electricity supply; cabinet (built-in brine tank) models are simpler to fit where space is tight.
- Always include a bypass valve, use the correct pipe fittings, and check every connection for leaks before fully restoring the water supply.
- Sizing matters: a softener that regenerates too often is too small, while one that rarely regenerates is too big for your household.
- Ongoing maintenance means topping up salt, cleaning the brine tank to prevent salt bridges, and budgeting from around £500 upwards plus any professional installation costs.
Table of contents
- Types of water softeners
- Tools and materials required for installation
- Selecting the ideal location for your water softener
- Steps for installing a water softener
- Common installation issues and how to fix them
- Maintenance tips to keep your water softener working efficiently
- How much does it cost to install a water softener?
- How Fountain Filters can help you
- FAQs
Types of water softeners
Before we go into detail about water softener installation it's important to introduce the two most common types of water softener available.
These are ion-exchange water softeners and salt-free water conditioners.
Ion-exchange water softeners
Ion-exchange water softeners remove the hardness minerals (calcium and magnesium) from water, replacing them with sodium ions.
The ion exchange process works in a resin tank, and the system periodically regenerates by flushing the resin with a brine solution.
Ion-exchange water softeners require regular maintenance and the addition of water softener salt.
Salt-free water softeners
A salt-free water softener alters the chemical structure of the calcium and magnesium to prevent them from sticking to household surfaces.
These systems use template-assisted crystallisation to neutralise the hardness minerals, making it easier for them to flow through plumbing without causing hard scale build-up.
Salt-free systems are becoming increasingly popular because they are low-maintenance and environmentally friendly. No salt is needed, and no wastewater is produced.
For the purposes of this water softener installation guide, we're going to concentrate solely on ion-exchange water softeners.
Tools and materials required for installation
There are some necessary tools and materials required for water softener installation.
Most people choose to employ the skills of a local plumber, so don't worry if you don't have everything required for installing a water softener.
The specific tools and materials you'll need will vary depending on the type of water softener you choose to install.
- A water softener system that is appropriately sized for your home. An ion-exchange water softener will normally contain a resin tank, brine tank and control valve.
- Plumbing supplies such as copper or plastic piping, pipe cutters, wrenches, PTFE tape, and fittings. You may need a torch and soldering equipment if you have copper pipes, or primer and solvent cement if you have plastic pipes.
Selecting the ideal location for your water softener
 Whichever type of water softener you choose, the question of where to install a water softener in your home is going to arise.
There are a few prerequisites about where to install a water softener:
- Adequate flow rate - at least 20 l/pm for a whole house system.
- Sufficient space.
- Easy access.
- Ion-exchange water softeners need access to a drain which could be a floor drain or utility room sink.
- Ion-exchange water softeners need an electricity supply.
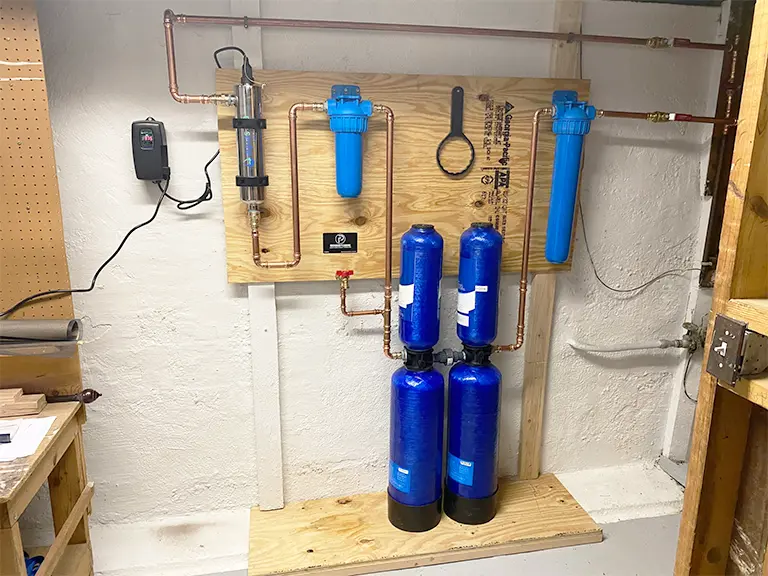
Realistically, you'll probably be installing a water softener in an under-sink kitchen cupboard, utility room, cellar, or in your garage. The general rule of thumb is that the water softener needs to be installed as close as possible to the entry point for water coming into your home.
That means you'll have plenty of space to work, but also easy access for water softener salt to be added, and any maintenance that needs to be done.
However, installing a water softener in the UK often means that the water supply comes in under the kitchen sink where there’s not much room.
In that instance, you may need to put a loop from the incoming water pipe, through the under-sink cupboard walls, and into a space that’s bigger. You then take the softener outlet pipe back to join up with the main water pipe again.
It’s also possible to punch through the kitchen external wall and install the water softener outside. However, it will need to be protected from frost and sunlight to ensure it doesn’t get damaged. You can do that by boxing it in, suitably lagged, in a small enclosure like a garden storage enclosure.
As people prefer not to drink softened water, you can fit a dedicated cold water supply up to the kitchen tap so the softened water isn't dispensed from there.
Steps for installing a water softener
Installing a water softener can seem like a daunting task, but with the right guidance and preparation it's a project that many homeowners can tackle themselves.
We're going to share step-by-step instructions for two different types of salt-based water softeners; one with a separate brine tank and one with a built-in brine tank.
Water softener installation for a salt-based water softener with a separate brine tank
Step 1: Choose the installation location
Select a suitable location for your water softener, typically near the main water supply line and close to a drain for the discharge line. Ensure there is adequate space for the unit and easy access for maintenance. It’s also important to choose a location that is protected from extreme temperatures and direct sunlight.
Step 2: Turn off the water supply
Before you begin any plumbing work, shut off the main water supply to your home. Open both the hot and cold tap to relieve the pressure in the pipes and drain any remaining water. This will prevent water from flowing while you work on the installation.
Step 3: Install the bypass valve
Most water softeners come with a bypass valve that allows you to easily divert water around the unit for maintenance or repair. Attach the bypass valve to the control valve on the water softener, following the manufacturer’s instructions. Secure the connections with PTFE tape to prevent leaks.
Step 4: Connect the water inlet and outlet pipes
Using the appropriate fittings and piping, connect the inlet and outlet pipes to the bypass valve. The inlet pipe carries hard water into the water softener, while the outlet pipe carries softened water to your home’s plumbing system. Ensure all connections are secure to prevent leaks.
Step 5: Set up the drain line
Connect a drain hose or tubing to the water softener’s discharge line and route it to a suitable drain or standpipe. The drain line should have a downward slope and be securely fastened to prevent dislodging.
Step 6: Install the brine tank
Position the brine tank next to the resin tank and connect the brine line to the control valve. Fill the brine tank with water and add the appropriate amount of water softener salt. The brine tank is responsible for regenerating the resin beads in the water softener and should be refilled regularly to maintain effectiveness.
Step 7: Turn on the water supply and test
With all connections secure, carefully turn on the main water supply and check for leaks. Open the bypass valve to allow water to flow through the system and flush any air or debris from the pipes. Plug the control unit to its electricity supply and switch it on. Follow the start up guide in the water softener installation instructions which will include setting the backwash timer.
Step 8: Initiate a back wash cycle
This will help clear out any residual air and allow the resin beads to settle in.
Remember to check all the connections for leaks and open the water supply isolator fully.
Water softener installation for a salt-based cabinet water softener
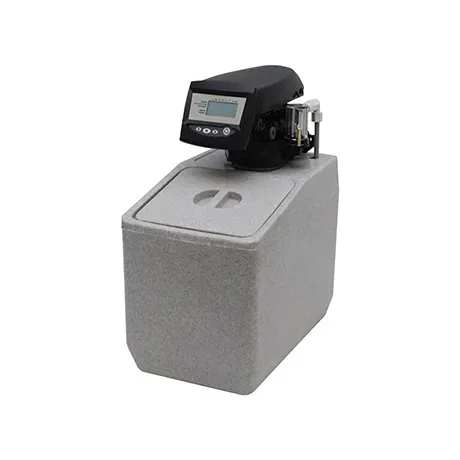
Cabinet softeners are simpler to install because they don’t have a separate brine tank. This makes them more suitable where there’s limited space, although they may have limited flow rate.
Step 1: Turn off the water supply
Turn off the mains water supply and drain the pipes by opening the hot and cold kitchen taps.
Step 2: Cut a section out of your mains water pipe
Following the water softener installation instructions that came with your water softener system cut an appropriate section out of the main water pipe using a copper pipe cutter or PVC cutter. It’s important to use the right tool to ensure a clean cut.
Step 3: Connect the water inlet and outlet pipes
Connect the water inlet and outlet pipes to the correct side – you may need to have obtained rigid or flexible pipes to do this. These are likely to have 22mm or 15mm compression or speed fit connectors. Ensure you have the correct sizes for your pipes and the connectors for the water softener ports.
Step 4: Set up the drain line
Connect the tubes to the drain and overflow if it has one. This is for the waste brine that’s generated during the backwash cycle.
Step 5: Add salt to the internal brine tank
Usually about half full. Add 5 to 10 litres of water into the brine well. Then plug in the control unit to its electricity supply, switch it on and press the “regen” button. Leave it for 2 to 3 hours.
Step 6: Set timer and switch the water softener on
Set the timer or meter on, and when the ‘regen cycle’ has completed slowly turn the water back on.
Check for leaks on all the new pipes and connections.
Common installation issues and how to fix them
There are a few common mistakes that people are prone to making when it comes to installing a water softener.
- Choosing the incorrect water softener capacity – each water softener has a capacity before a ‘regeneration’ is needed. Regeneration is where the resin inside the water softener is cleaned, refreshing its capacity and ability to soften water. If water ‘regenerates’ too often the system is too small for your home. If regeneration is infrequent, it’s too big.
- Choosing an inappropriate place to install your water softener - It’s important to choose a location that is easily accessible so that you can carry out maintenance easily. For ion-exchange water softeners the system needs to be located close to a drain for the discharge line.
- Installing a water softener in an area prone to freezing temperatures or direct sunlight – freezing temperatures and direct sunlight can damage a water softener and reduce its efficiency. You must ensure your water softener is sited in a space with proper ventilation and protected from direct sunlight.
- Using incorrect plumbing connections - it’s essential that you follow the manufacturer’s instructions carefully and use the appropriate fittings and materials for your specific setup. Failing to secure connections tightly or using incompatible materials can lead to leaks and water damage.
- Missing out the bypass valve - not installing a bypass valve can make maintenance and repairs more difficult, so be sure to include one in your installation.
Maintenance tips to keep your water softener working efficiently
If you are going to invest in a water softener you are also investing ongoing time (or somebody else’s time!) in regular maintenance to ensure your water softener system is operating efficiently and effectively.
Taking care of your water softener will extend the lifespan of your system and prevention is better than cure when it comes to common issues arising.
Some of the most important maintenance tasks are:
- Regularly checking and replenishing the water softener salt in the brine tank. How often you do this will depend on your water usage and the hardness of your water, but it’s generally recommended to check the levels at least once a month. Keeping the brine tank adequately filled ensures that the resin beads in the water softener can regenerate properly and continue to remove calcium and magnesium (the hardness minerals) from your water.
- Cleaning the brine tank periodically to prevent the buildup of salt bridges and sludge. A salt bridge is a hard crust that forms in the brine tank and can prevent the salt from dissolving properly. To clean the brine tank, turn off the water supply, empty the tank, and remove any residue buildup. Rinse the tank thoroughly before refilling it with fresh water and salt. This maintenance task should be done at least once a year or more frequently if you notice any issues with the system’s performance.
- Taking an interest in and understanding your water softener system by looking out for any signs of wear or damage. Check the control valve, resin tank, and plumbing connections for leaks or other issues. If you notice any problems, address them quickly to prevent further damage and ensure the continued effectiveness of your water softener. Regular maintenance and timely repairs can help you get the most out of your investment and enjoy the benefits of softened water for years to come.
Even with regular maintenance, you may encounter occasional issues with your water softener. We've written a handy article called 'troubleshooting common water softener issues' which guides you through common water softener problems and how to fix them.
How much does it cost to install a water softener?
Investing in and installing a water softener involves several cost considerations, from the initial purchase and installation to ongoing maintenance and operation. Understanding these costs can help you budget effectively and make an informed decision about the best water softener system for your home.
The initial cost of a water softener can vary widely depending on the type and capacity of the system but think £500 upwards.
Then you’ve got the professional installation costs, which will be heavily influenced by the availability of plumbers in your local area and the complexity of the installation.
You must weigh up all these upfront costs versus the long-term benefits that a water softener can give you.
How Fountain Filters can help you
As experts in water filtration we hope you’ve found this guide useful. You now have some knowledge and confidence about installing a water softener.
We are here to help guide you through the process of determining if a water softener is the right product to install in your home.
If a water softener turns out to be the best option, then we can supply the system and deliver it to you free of charge to any UK address.
We're also on hand to help with any issues that arise both during the installation and afterwards. We're renowned for our high level of customer service and won't ever leave you in the lurch.
Contacting us is easy, either by calling us on 01352 838 281, or sending us a message through our contact page.
FAQs
Can I install a water softener myself?
Water softener installation is not usually something that many DIYers would consider and, realistically, it is something for the more confident person. If you have any doubts about cutting into your mains water supply, which will be required for any water softener installation, then we really do recommend contacting a local plumber.
Does a water softener use a lot of electricity?
No, water softeners are like small household appliances, using minimal power.
Are water softeners worth it in the UK?
If you’re fortunate to live in an area that doesn’t have hard water, then you don’t need to install a softener. If you do have hard water, you’ll know about it because you’ll almost certainly be sick of scale build up on your taps.
How much does it cost to install a water softener in the UK?
The initial cost of a water softener can vary widely depending on the type and capacity of the system but think £500 upwards. If you’re not installing it yourself, you’ve also got the professional installation costs, which will be heavily influenced by the availability of plumbers in your local area and the complexity of the installation.